XKR – Fog Lights and Automatic lights on

XKR – Fog Lights and Automatic lights on

The XKR was due for its annual MOT and so I did a quick check of the usual items, lights, horn, tyres etc. It turns out the front fog lights did not want to come on. This is an MOT failure so needed to be fixed. I started debugging by looking at the Fog Lamp relay. It had power and if I connected the drive to the relay coil to ground, on came the lights with no issue. Obviously it was the switching side of things. I took the centre console out and then the switch assembly. It looked fine and I confirmed that the switch (a momentary short to ground) was working fine. I then turned my attention to the Body Controller unit which is behind the passenger side “cubby hole” it was a bit if a pain to get it out. Once out I took it apart looking for signs of dry joints, heated components etc. No such luck so I tested the continuity of the wires involved and all seemed OK.

I put it all back together and went for a drive, still the same. A few days later I drove it at night for the first time in a while and noticed that the dashboard lights went off when the headlights were turned on. Side lights were fine, dashboard lights worked when they were on. So this led me to believe there was an issue with the indicator/light stalk. The auto function had never worked since I had owner the car and now it looked like there was a secondary issue with it.

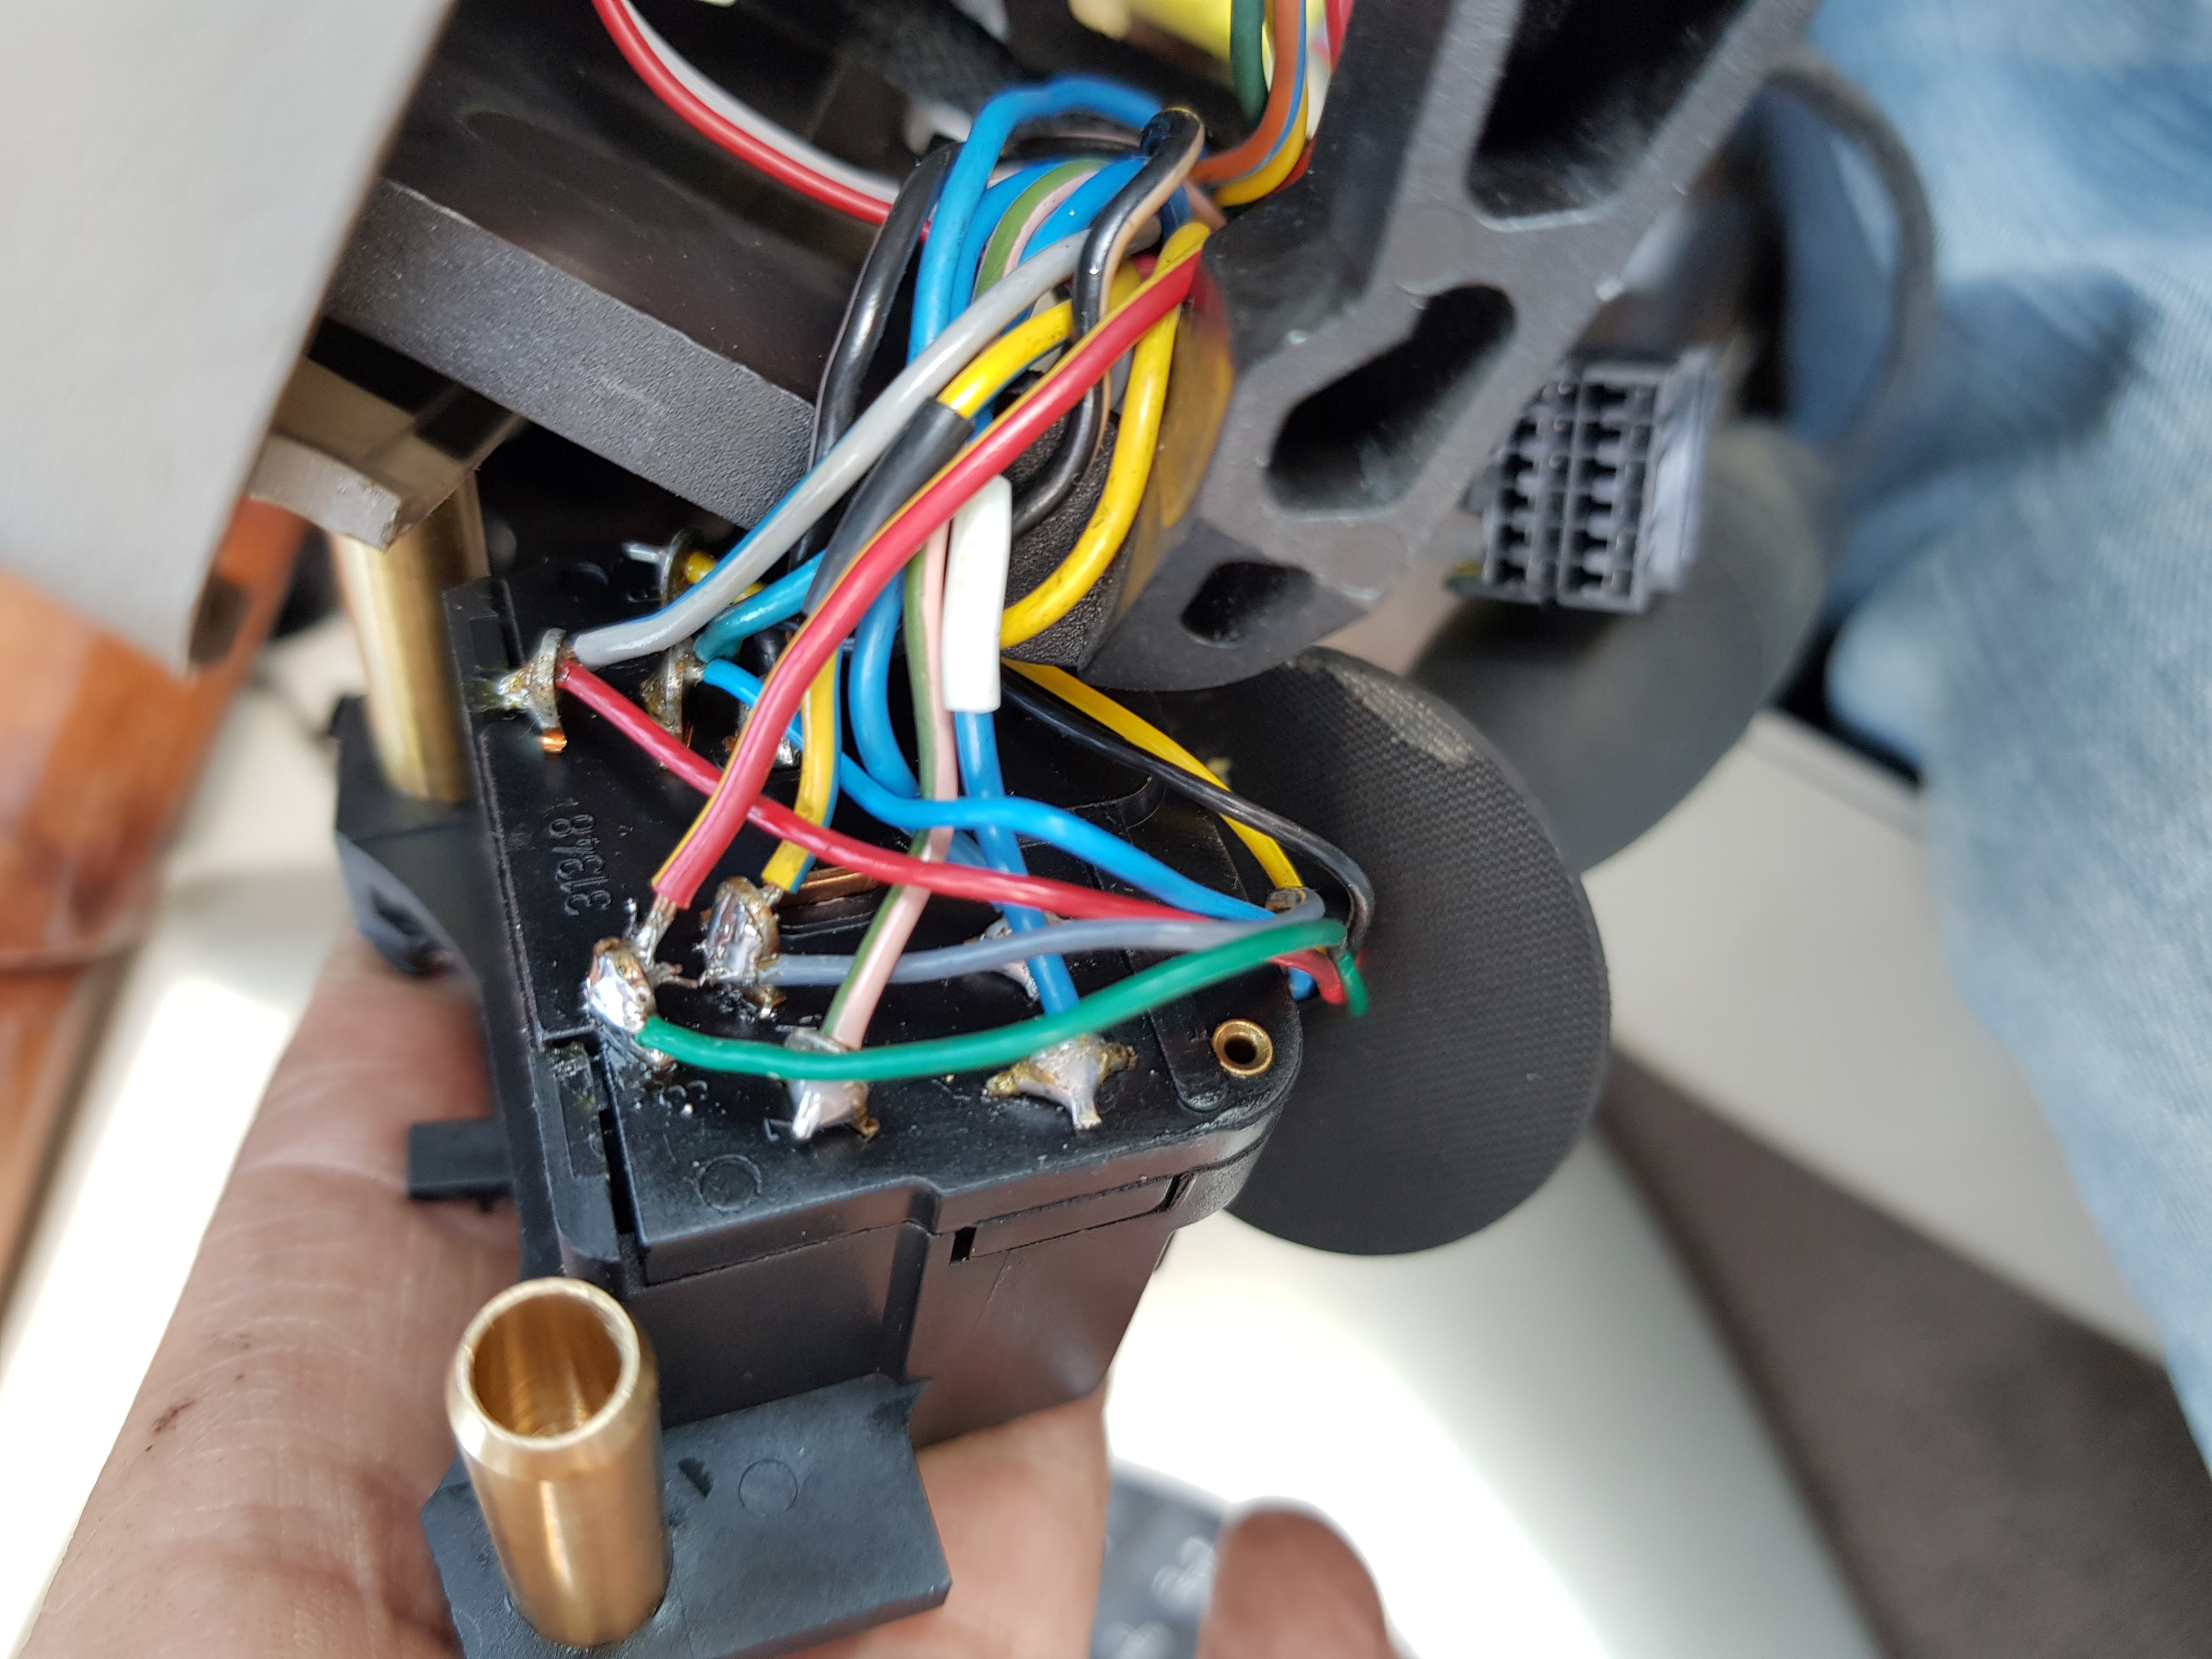
A quick look on youtube followed, on how to remove the covers around the steering column and then worse case, take off the steering wheel. Having removed the covers, it was immediately apparent the issue was due to two wires no longer connected to the switch as per the photo. There was no easy way to tell where they came from so I had to take the steering wheel off and get a better look.

Loose Wires

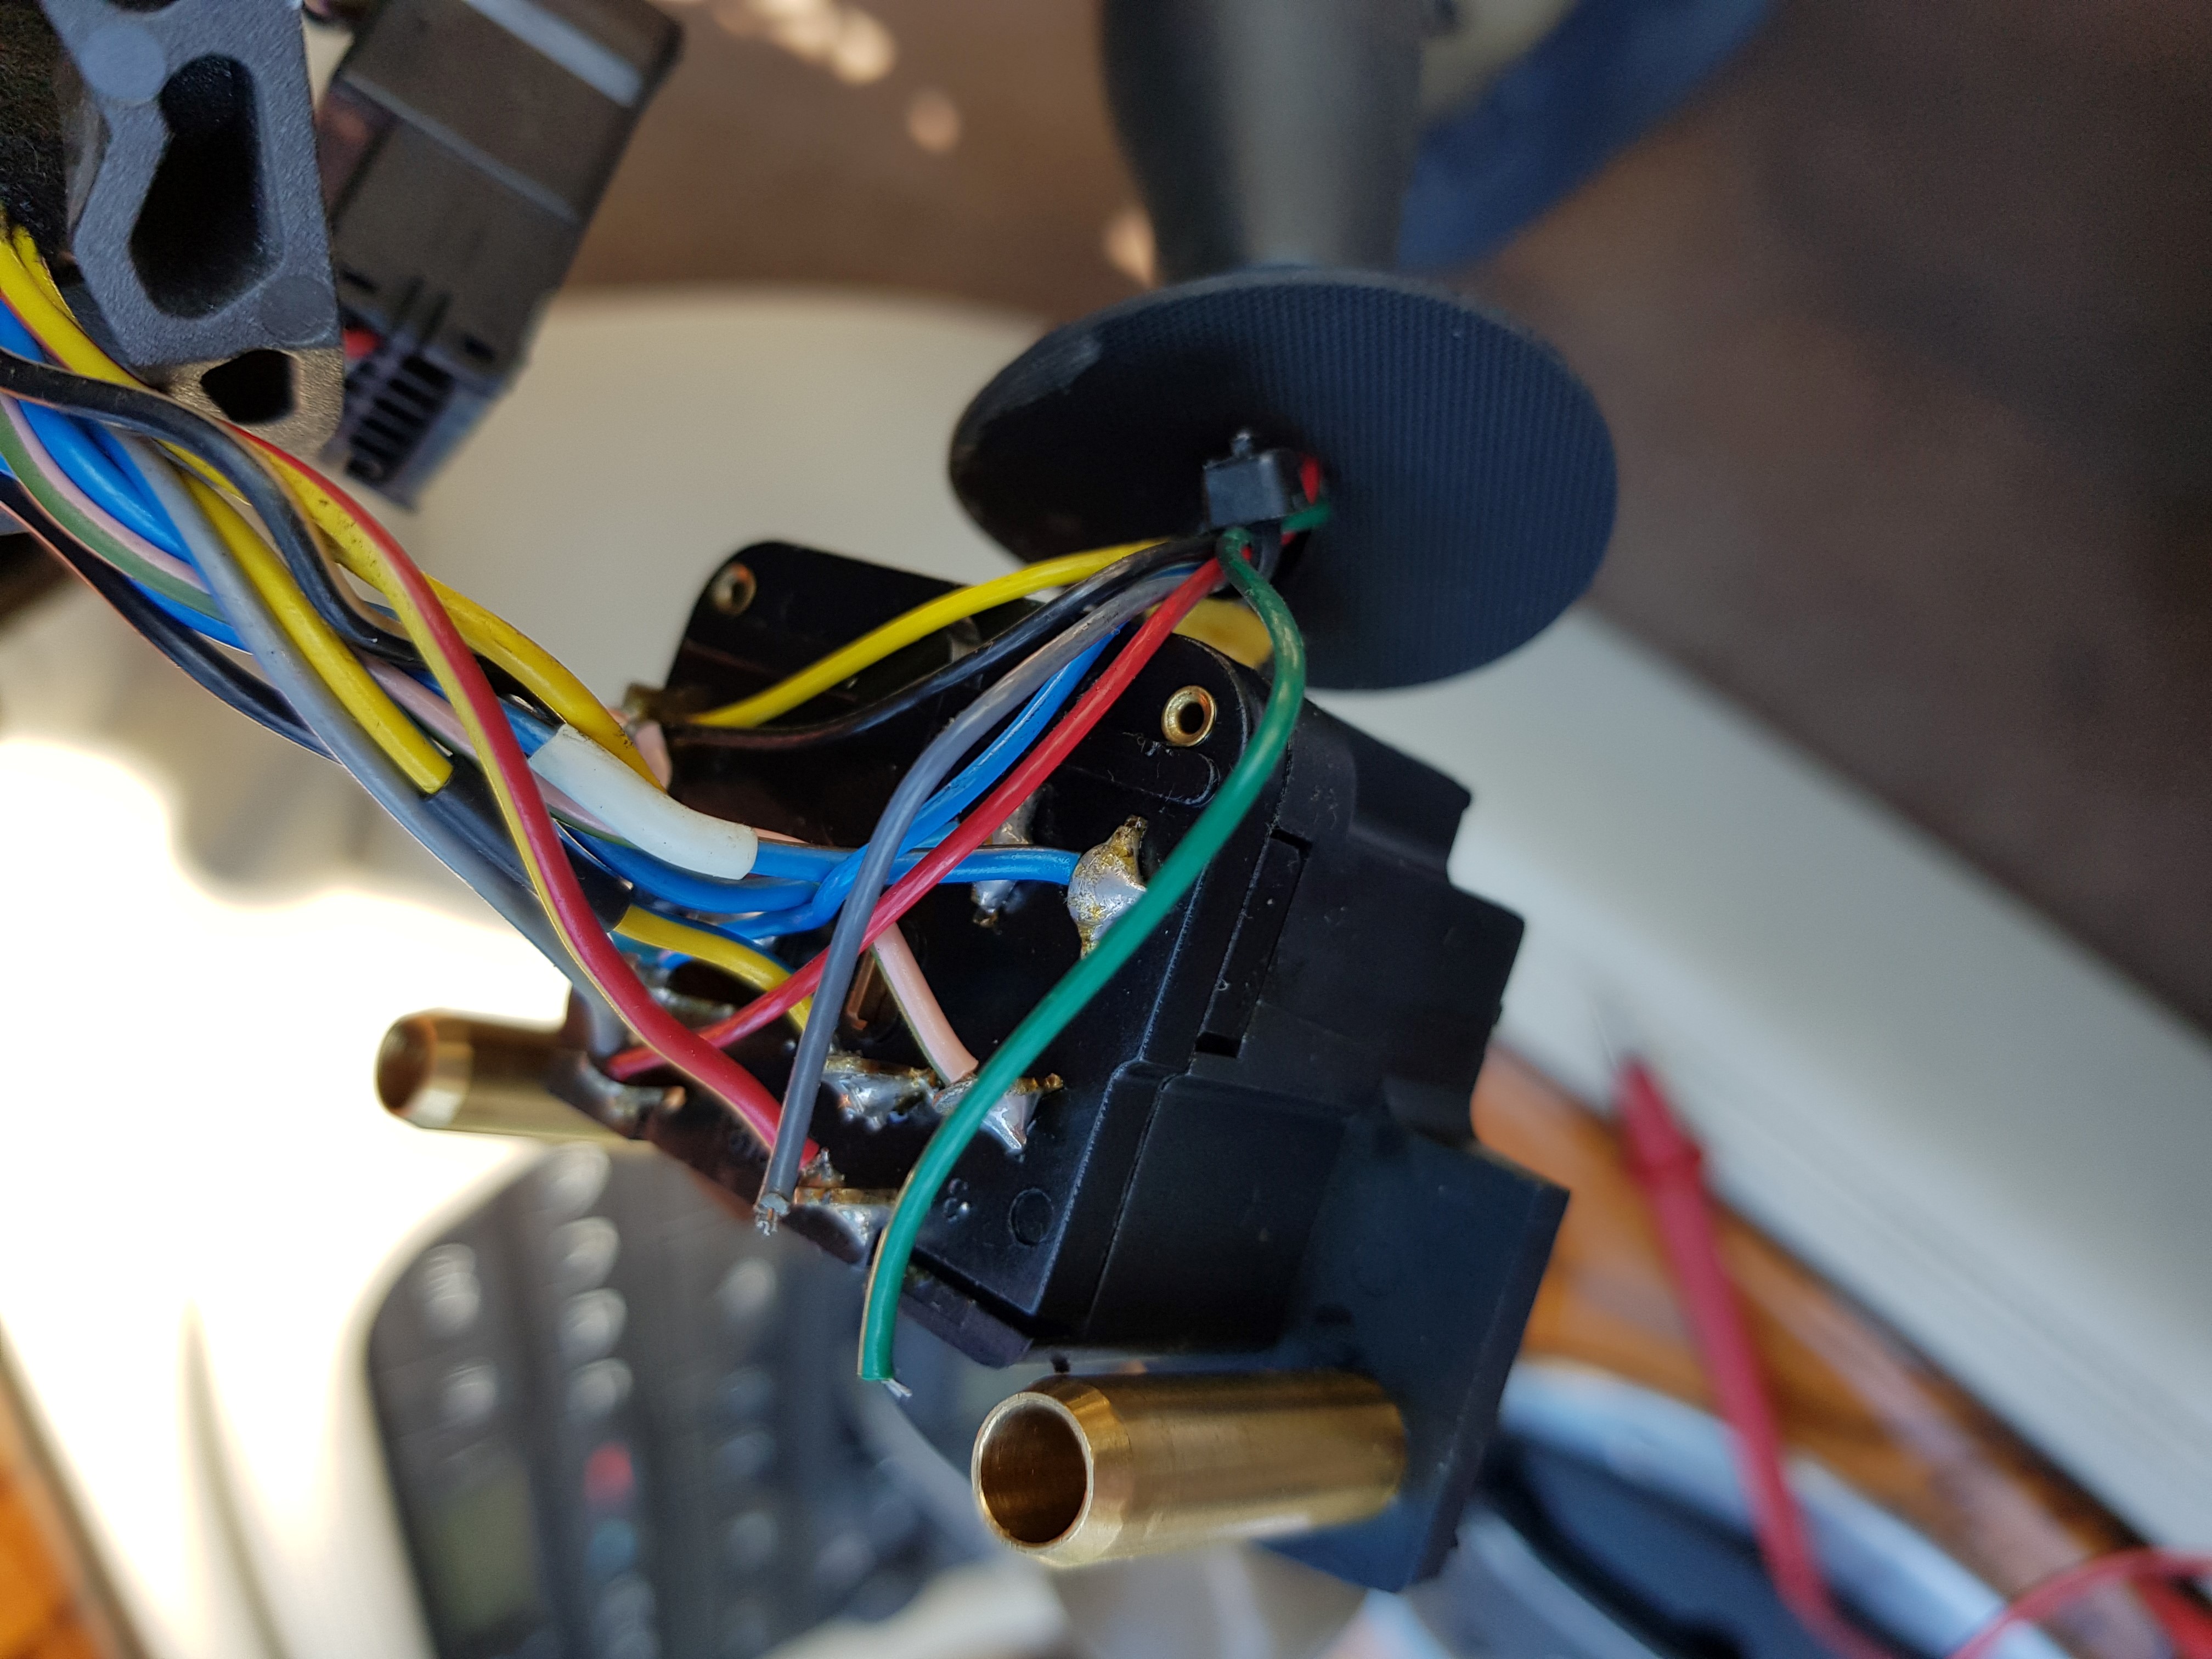
I carefully removed the airbag having disconnected the battery and shorted the live to chassis to discharge any residual current in the system. Removed the two screws holding in the switch and then I could clearly see the pins and wires. A close look with a magnifying glass revealed two contacts on the switch showed signs of the remains of broken wires. I did spend a little while trying to identify which wire went where. I also did some internet searching as well but failed to identify which way round they went. The circuit diagrams do not go into the level of detail between the stalk and the external cabling plugs.

Well there were only two wires so not a lot of choices. I decided the longest wire, the green one went on the outside and the other went to the inner contact. I soldered these on and hey presto, the front fog lights now worked. A few hours later I tested it in the dark and I had also fixed the dashboard lights and the auto function also worked!


Wires Soldered On
Wires Soldered On

Later that evening I logged onto my laptop and started to close down all the various windows I had opened during my searches. There was one PDF about interior lights dimming when the indicators were used. Sure enough there was a picture in the PDF that clearly showed a wire broken off of the same indicator stalk. At least it proved to me that the wires were now in fact in the correct place but I could have done with seeing it earlier 🙂

XKR – Green Shower

XKR – Green Shower

Some of you may well have heard about the “XK Convertible Green Shower” issue. It is caused by the hydraulic pipes that drive the convertible roof latch degrade over time and then leak. This then drips/pours through the grill in the overhead console and covers mainly the gear lever/centre console and splashes you too. I had heard of this and I had seen a pipe replacement and a pump replacement in the service history for my car. Well it turns out they only changed one of the pipes and the second failed a few years later as per the images.

Failed Pipe
Failed Pipe
Failed Pipe
Failed Pipe


The previous repair was to swap out only part of the pipe rather than the whole pipe. This allows for just the removal of the windscreen surrounding interior panels rather than the major job to replace the whole pipe/s. This was an official repair option which jaguar later stopped supplying.

Inital Jaguar repair option
Initial Jaguar repair option

Having done some research on the various forums I tracked down a replacement set of pipes with a higher pressure rating than the Jaguar ones. I decided this was a better option as I did not want to use the Jaguar ones again plus these were also higher rated and cheaper.

The ones I purchased were from CRH https://www.cabriolet-roof-hoses.com/ and I just went for both front hoses at £109:98. I also purchased the some replacement oil from amazon “febi bilstein 06161 Hydraulic Fluid (Green) 1 Litre” You only need one Litre.

I also watched all the 9 episodes of a DIY repair on youtube https://youtu.be/5DuIuveFbHE there are 9 episodes. If you start watching these you will also see one pop up in the viewing list with a warning trying to tell you it is not an easy repair and to call him to do it for you. Sure, are you coming over to the UK to do it for me?

I agree it is quite a big task as you do have to remove a lot of interior parts to replace the pipes but none of it is challenging, it just takes time. The steps are as per the youtube video 1-9 but summarised for a UK right hand drive car as follows:

  • Remove the trim around the windscreen and A pillars
    • This is where the first pipe repair was situated
  • Remove centre console
  • Remove Passenger seat
  • Remove rear seat lower squab and then the back
  • Remove the various rear seat side trim panels
  • Lift the roof about 1/3 to get access to the exit hole into the boot
  • Pull out the old pipes and replace with the new ones
  • I eased the pump out so I could refill the fluid. There is just a cm or two above the hole when in place but you can fill in place using some kind of pump and pipe setup
  • Rerun the pipes following the same route
    • I would recommend attaching the pipes to both ends before putting the interior back as I needed to lose a little bit of slack. I did this alongside the centre console rather than in the foot well.
  • Once fitted I did a few open and close sequences and it works fine.
  • Put the various interior parts back in taking the opportunity to clean those parts not easily accessed when fully assembled.
  • Open the roof and take a well earned drive in the sunshine with the wind in your hair

If you are reasonably handy then I would definitely recommend attempting the repair and watching the Youtube video.

Just Go For it 🙂

Jaguar Jobs

Jaguar Jobs

Its been 10 months and I have not been able to do anything to the XJ6 other than pile stuff up on it! I have made some drawings and discussed with the local planning office what is an acceptable option regarding expanding the garage. More to follow once I get planning approved.

I have however been carrying out a number of repairs and maintenance tasks to the family cars since my last update. Also fitted a kitchen and all sorts of other non car related tasks!

  1. XKR larger jobs
    1. Changed disks and pads all round and upgraded to red stuff pads. Seems very similar to the previous standard pad but does produce less dust
    2. Had a weird issue where the fog lights stopped working – Story here
    3. Had the well known “green shower” issue- story here
    4. Replaced the coolant header tank to fix the “low coolant” error message
    5. Replaced the anti roll bar rubber bushes as they failed and caused the roll bar to clonk against the chassis at the slightest bump
    6. I still have a fairly regular “restricted Performance” error message. I have twice looked though all the intake piping for leaks but struggling to resolve this error.
  2. X-Type jobs
    1. Changed disks and pads all round. A week later the brake fluid level light came on and further investigation revealed I had a leak from the drivers side rear caliper. I replaced the caliper with a refurbished one from a local auto factors however it had an issue with the automatic handbrake adjustment. After a few miles and applying the hand brake a couple of times, the pads remained pushed up against the disk. This caused binding and overheating. I rewound the caliper back in again and went on a long trip to Le Mans without using the handbrake. Whilst there it started to bind up again. I removed the caliper and wound the piston back in and it was OK for a few miles then did the same again. I then wound the piston back in again but this time left the handbrake cable disconnected. We drove back from France quite happily. After about a week of driving without issue I reconnected the handbrake. 5 miles later, binding again. The Auto factors were great and swapped out the faulty one without issue. We drove the car for a further couple of weeks without issue before returning the original old caliper to get the deposit back.
    2. We were getting ODB” error messages pointing to one of the 02 sensors. Because I was so busy with the house, we dropped it off at the local garage. They changed an 02 sensor and it worked for a couple of days but the error returned. The garage said they used a “replacement” part and swapped it out for a genuine Jaguar part. It lasted another two days before the error came back again. The garage then looked at it and said there must be an error with the loom so take it to a jaguar dealer. I decided it was time for me to get involved and noticed that the error message was different to the one we initially had. It too, pointed an 02 sensor, bank 1 upstream. I took of the connector and measured across the heater pins. It was reading ~1.6k ohms where as the bank 2 sensor was reading just an ohm or two. I ordered a replacement from S & G Barratt part number C2S51801# which is an alternative (SNG Barratt recommended) part. It costs £75 +VAT compared to £134 +VAT for the Jaguar original. It was a bit of a pain to remove the old one but managed to get there and problem has been resolved for over a month now.
  3. Having attended the Le Mans Classic with me for the second time, my daughter decided that she wanted a classic car as her first car. We ended up with a 1976 MG Midget 1500. It is a little rough around the edges but nothing a little finessing from me cant resolve. Yet another car to add to the endless list of jobs. Especially with a front suspension requiring a grease every 1500 miles!
  4. Replace disks and pads on sons Renault Clio. Nothing else really to say about that

Can’t wait to build a new garage with a two post lift 🙂